
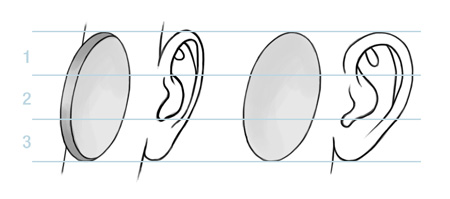
The illustration below shows the placement of the ears on the head. They occupy the middle third of the face. The top of the ear typically lines up with the browline or eyebrow, and the bottom lines up with the base of the nose. In side view, the front edge of the ear sits on the halfway line of the head, directly behind the jaw.

The ear has a backward slant, which roughly matches the slant of the nose in profile. There is also a slant on the ear in other viewpoints, as illustrated below. In the top view, they parallel the slant of the skull, which is wider at the back. In the front and back views, they slant in parallel with the inward-sloping sides of the head.

They mostly sit quite close to the head, though of course some people’s ears buck the trend by sticking out a lot.
When the head tilts up or down, the placement of the ears is important in creating the impression of the tilt. When the head tilts downward, the ears rise high relative to the other features, and vice versa.

Structure
The auricle conducts to the auditory canal via the partly concealed ear hole (or ‘auditory meatus’) on the side of the skull.

Like any body part, ears are highly variable, but all share the same basic construction. The ear is often compared to a shell. It is made of a rumpled plate of cartilage with a fleshy lobe at the bottom. We’ll talk about its component parts first and then look at how to simplify them.

In the middle is a bowl called the concha that attaches the ear to the head.
The helix – meaning ‘spiral’ – is like a pipe or cylinder running along the outside edge. The helix curves over the top of the ear and back inside, almost in a circle, and transitions into the soft earlobe at the bottom.
Inside the helix is a Y-shaped form called the antihelix. The upper branch of this ‘Y’ is normally larger and softer than the lower one. The bottom of the antihelix connects to a bump called the antitragus, at about the same level that the helix merges with the earlobe.
The antitragus faces another bump called the tragus, the two facing each other across a notch in the bowl of the ear and helping to protect the earhole.
Unlike the rest of the ear, the lobe is made of fatty tissue, not cartilage. On some people it hangs entirely free from the rest of the head, in others it attaches fully along its inside edge, with other degrees of attachment between these extremes.
This is a complicated structure, so we need to simplify it into forms we can grasp more easily. To begin, try thinking of the ear as a modified ellipse attached to the side of the head. It can be roughly divided into three, with the Y of the antihelix in the top, the bowl in the centre, and the lobe in bottom.
Three basic forms
To get to the next level we can think in terms of three main forms. The outer rim of the ear is a bit like a question mark (corresponding to the helix and lobe). For the inner convolutions, we can start off with a swooping letter Y (for the antihelix). Then we add a notch to complete the earhole: the bump on the left is the tragus, the foot of the Y becomes the antitragus.

Helped along by this technique, we can then soften the edges and introduce half-tones to make the ear we're drawing more organic and realistic.
Back view
As for the back view of the ear, we can simplify it as a squat cylinder attached to an S-curve. If we shift it round to a three-quarter view, we acquire a slight corner.

Tips on drawing the ear
Like any human feature, the ear is highly variable. Ears range from tiny and delicate to bulbous and heavy. When they take a regular pummelling they end up as the ‘cauliflower ears’ of boxers. They can lie tight to the head or project outward, the bowl can be deep or shallow, etc. When we use our ‘three basic forms’ to construct an ear, we can of course vary the elements, to create any sort of ear we need:

A common mistake when drawing the ear is to draw the helix continuing into the tragus. In fact it curls past the tragus into the bowl of the concha.

The helix is basically a snaking cylindrical form, so we shade it the same way we would shade a cylinder, staying aware that the light and shadow shift as it turns direction. At the top, the helix casts a shadow on the branches of the antihelix, and it sinks itself into shadow as it enters the bowl of the concha.
Owing to its bowl-shape and the ridges that surround it, the concha is usually the darkest area of the ear.
How to paint the ear
Here is a step-by-step tutorial on how to paint realistic ears, from three angles: front, three-quarter and side.
1. Canvas
Start with a new canvas. Since there are three ears and we want them to stand out individually, let’s begin with a neutral colour as a base and paint the flesh tones on extra layers on top.

2. Sketch
Sketch the ear on a new layer. Remember it is slanted. Broadly define the height and width, then mark out the three main forms: the question mark, letter Y and notch.

Keep checking your sketch against the source to make sure you’re getting the relationships right.
3. Colour blocking
On a new layer below the sketch, block in the main regions with basic colours. Try to use a range of colours, rather than just lighter and darker versions of your base flesh colour – here I’ve added a couple of browns and reds. Decide upon your light source and mark out the major lights and darks.

In my example, the light is coming from above, so the top of the helix is lighter, and I’ve added highlights to the tragus and antitragus. Note the shadow cast by the helix upon the antihelix, and by the lobe upon the flesh beneath.
You can drop your sketch layer around this stage: either deleting it or leaving it in and painting over it.
4. Shading
Now build up the details. Stay aware of the minor planes as you refine the forms by adding subtle shifts in tone and reflected light.
Eat into the highlights so they don’t look too crude and shiny. These depend of course upon your light source.

5. Final details
To finish off, and without overdoing them, touch up your highlights and darks. Make sure you are happy with the amount of contrast across the whole picture and adjust your values.
Add some texture on a new layer at low opacity: dabble with a speckled brush, or scribble freely with a very small normal brush. Smudge it a bit to avoid any too-obvious dots – then duplicate the layer, darken it and shift it sideways a bit to increase the sense of texture. Try to observe and paint some of the larger specks and bumps that give the skin its texture.
The ear can be hairy so consider a few hairs around the earhole region.

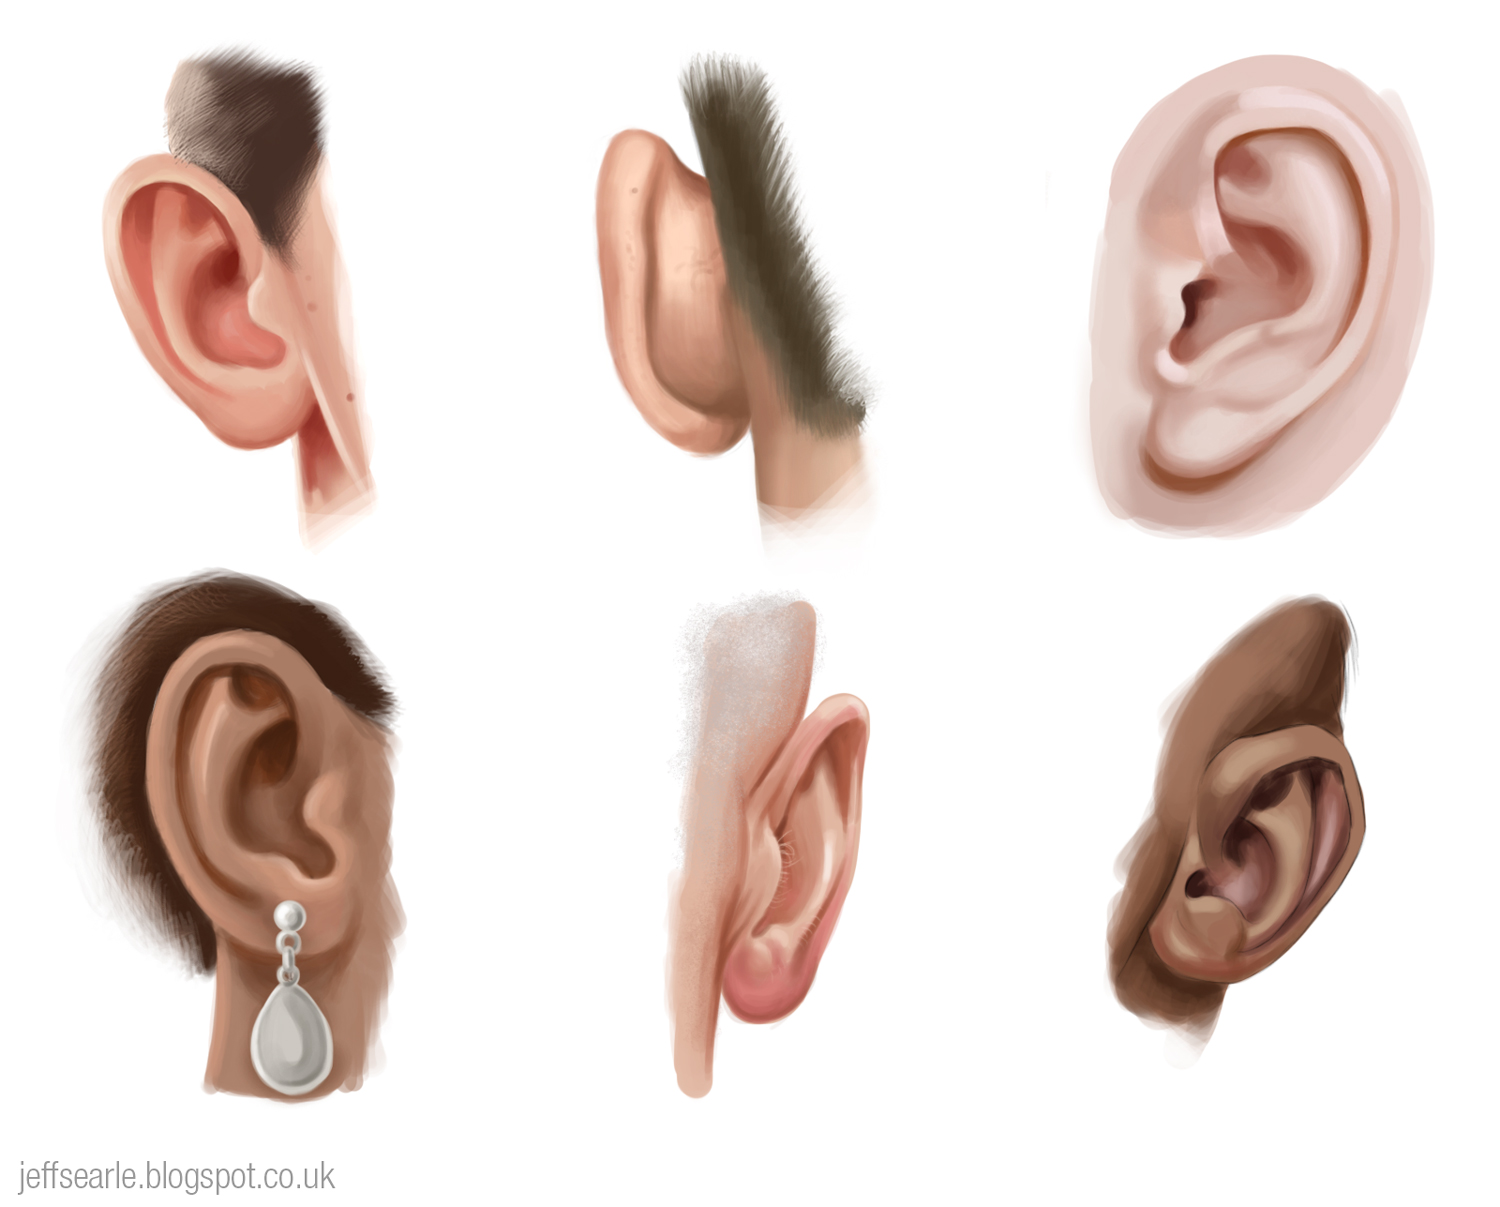
My finished ear studies. Click to enlarge.
Here are a few studies I did myself:
Thank you for posting this - I found it really helpful in explaining the shape of the ear. I recently found your blog and your tutorials are great! ^_^
ReplyDeleteThanks, glad you found it useful.
ReplyDeleteThank you :)
ReplyDelete