
Anyone can do it. All you need to know, he explains, is how to draw a circle. Here’s mine. It’s hand-drawn, not so it’s not a perfect circle, which is fine.

The secret of drawing heads – the secret, in fact, of drawing anything – is to describe it using simple forms which you are familiar with, and whose behaviour you understand. By building up simple forms, we can arrive at very complicated ones.
We can conceive the human head as basically a kind of ball. By drawing a vertical and a horizontal line on our circle, we give ourselves some construction lines.

So far our circle is a flat disc. Turn the ball, and the construction lines turn with it. Rely upon your eye to tell you where the lines go. With three simple lines we have created the illusion of a three-dimensional object. If it helps, mark the axis so you know which way is ‘up’.

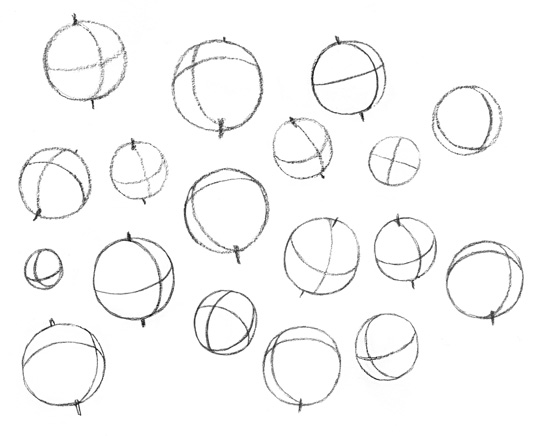
These lines act as a guide to where our ‘real’ lines should go. We can turn the ball in different directions and always know where it’s pointing. The better you can knock out basic construction balls like these, the better you will be at drawing heads, so practice drawing a bunch of them. Fill a sketchbook page. Here are some I did in pencil:
By building up your simple forms, adding additional ones to this basic ball “like lumps of clay” (as Loomis puts it), you can create solid, realistic-looking images. When your drawing is finished and the construction lines hidden or erased, no one would guess how easily the effect had been achieved.
Get drawing.
Draw faintly while sketching things in, then draw more heavily once you have the lines you want. In the example below, the sketchlines are shown in blue.
1. Start by drawing a ball. Again, don’t worry about making it ‘perfect’. If anything, imperfection adds character.

2. Add vertical and horizontal lines, like on the construction ball, to show the direction your head is facing in. Mark the nose in the middle, and crosslines above and below for the eyes and mouth.

3. Sketch in the features: the eyes, brows, mouth etc. You can add other shapes as you please – see how the nose and chin are basically made up of ball shapes.

4. Draw it in, then erase your construction lines. You have drawn a simple head!

Don’t be discouraged if your first efforts aren’t the greatest. Every artist has to find their way in the beginning. Keep drawing more heads and you’ll get the hang of it. I’ve done some more examples below.

Remember, the construction ball is designed to help you create an illusion of three-dimensionality. Using a dotted line, we can ‘draw through’, i.e. indicate the sides we can’t see, helping us understand the form.

You can add another vertical line to the construction ball down the side, dividing it into quarters. This shows you roughly where the ear should go.

Build shapes onto the construction ball
Try to use shapes that give you the effect you want, and vary them so that every head is different.

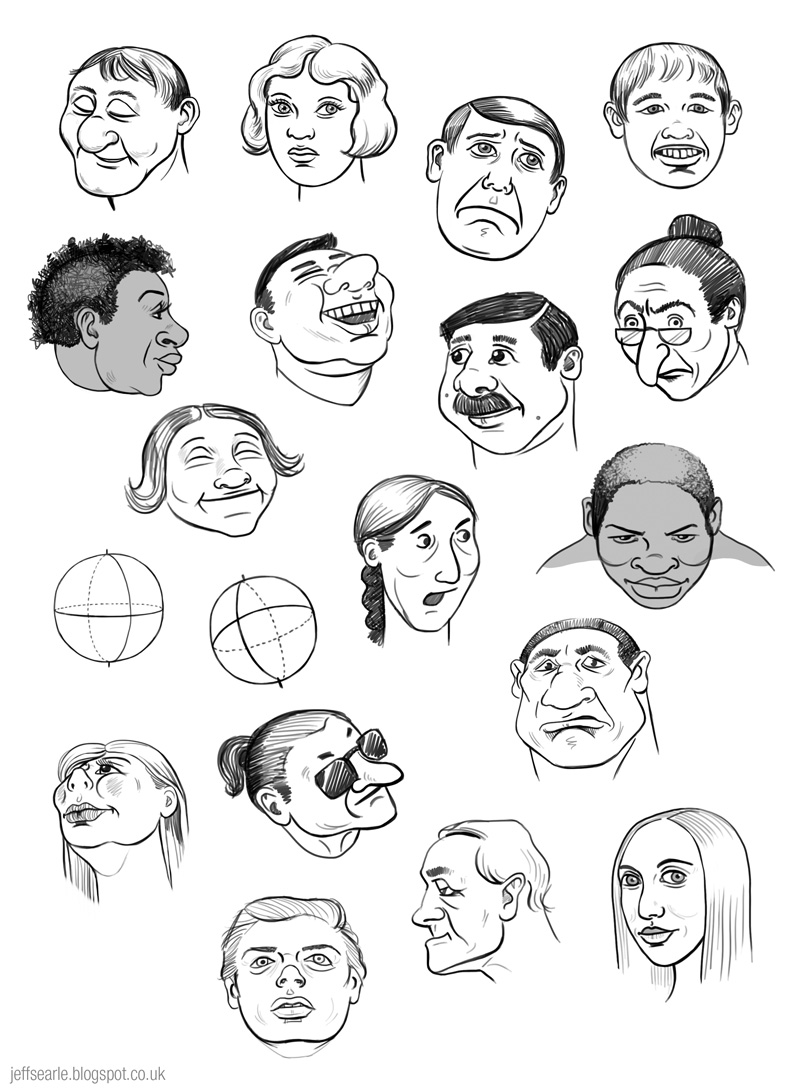
It’s a bit boring to draw the same generic person over and over again. There’s no limit to the range of angles, expressions, styles and characters. You can draw young and old; male and female; black and white; happy and sad; curvy shapes and blocky shapes; smooth cartoony lines or scribbly lines. The construction ball is a guide, not a strait-jacket. You’re free to play with it, to break out of its bounds. What matters is that you get the head you want.
This method is great for quick, cartoony heads. There is an awful lot more to drawing the human head, so maybe I’ll write more another time. Meanwhile, below is a bunch of heads I’ve drawn myself using this approach. I like to work digitally, so these were drawn in Photoshop using a Wacom Intuos tablet.
No comments:
Post a Comment
I welcome contributions to this blog. Comments are moderated.